User manual
Reporting an incident
Step-by-step guide to the report form, with or without an account.
The report form has up to ten short sections and a final review page. Only the sections that apply to your incident are shown. Everything is checked again before it is saved, so nothing you type is lost if something needs correcting.
1. Start the report
Select Report an incident in the menu. The row of numbered steps at the top shows where you are; you can move between sections with Next → and ← Back, or by selecting a step.
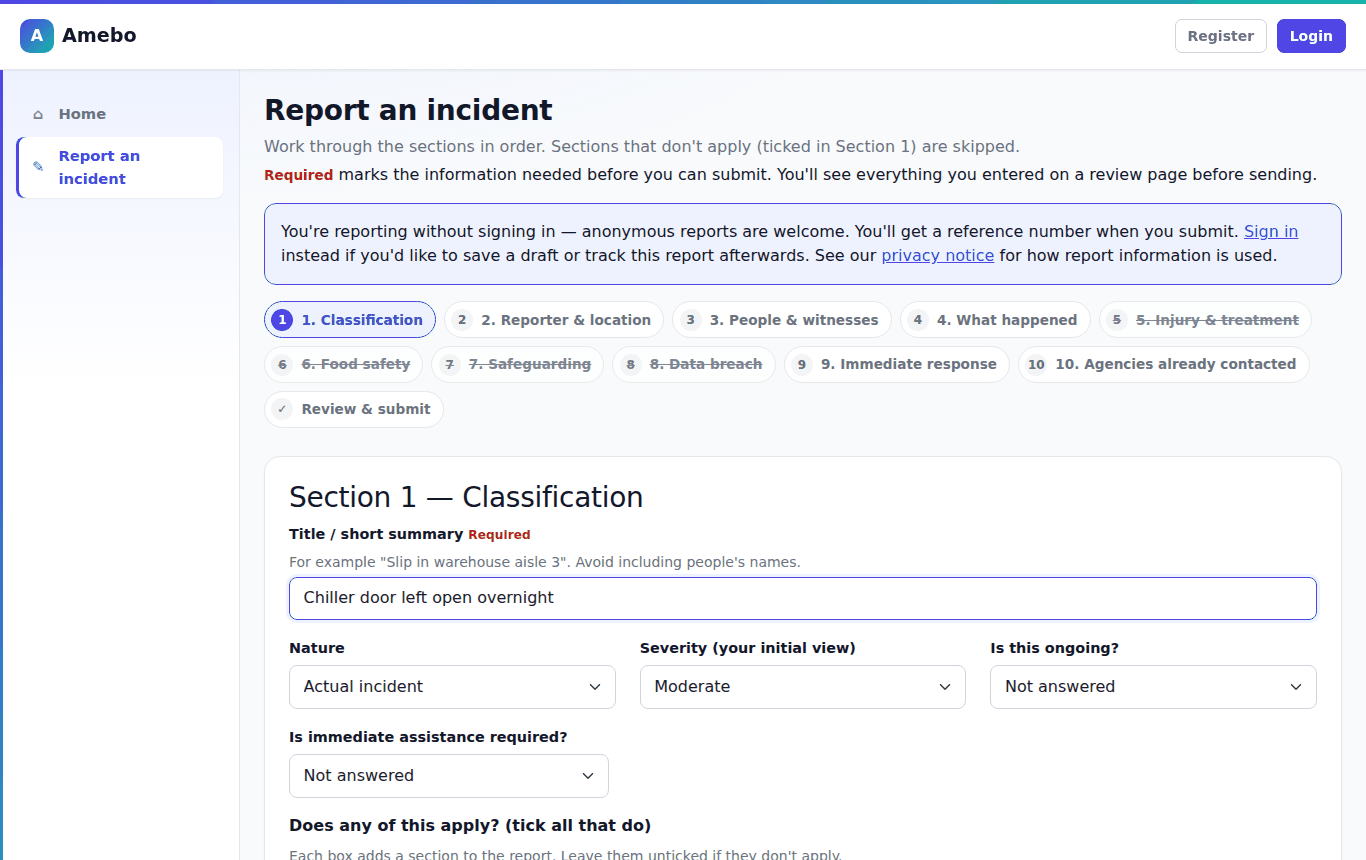
2. Section 1 — Classification
- Title / short summary (required) — for example "Slip in warehouse aisle 3". Please do not put people's names in the title: titles appear in email notifications.
- Nature, Severity (your initial view), and whether it is ongoing or needs immediate assistance.
- Does any of this apply? — tick injury, food safety, safeguarding or personal data. Each tick adds the matching section (5–8) to the form.
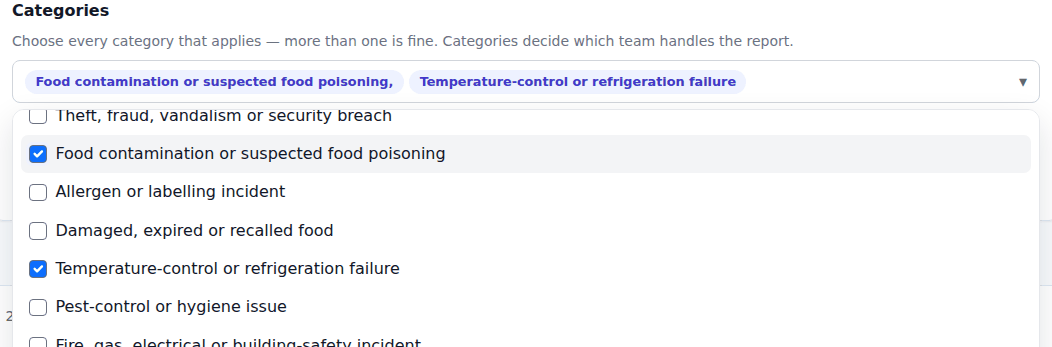
Choosing categories
Open the Categories list and tick every category that applies — more than one is fine. You can type to filter the list. Chosen categories appear as chips; select a chip's × to remove it. Categories decide which team handles the report, so choose carefully.
If something is missing
If a required answer is missing or not valid, a red There is a problem box lists each issue. Select an issue to jump to the field.
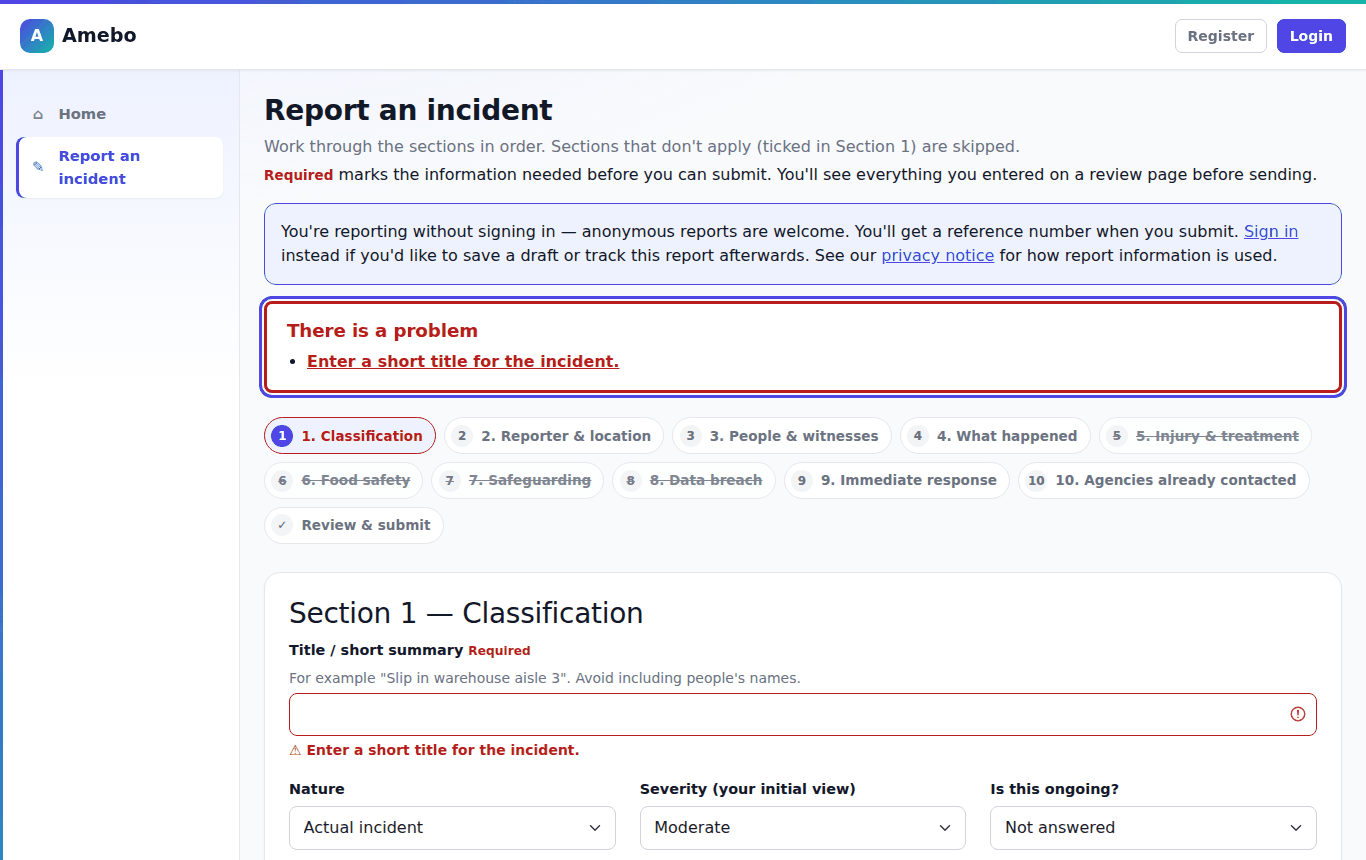
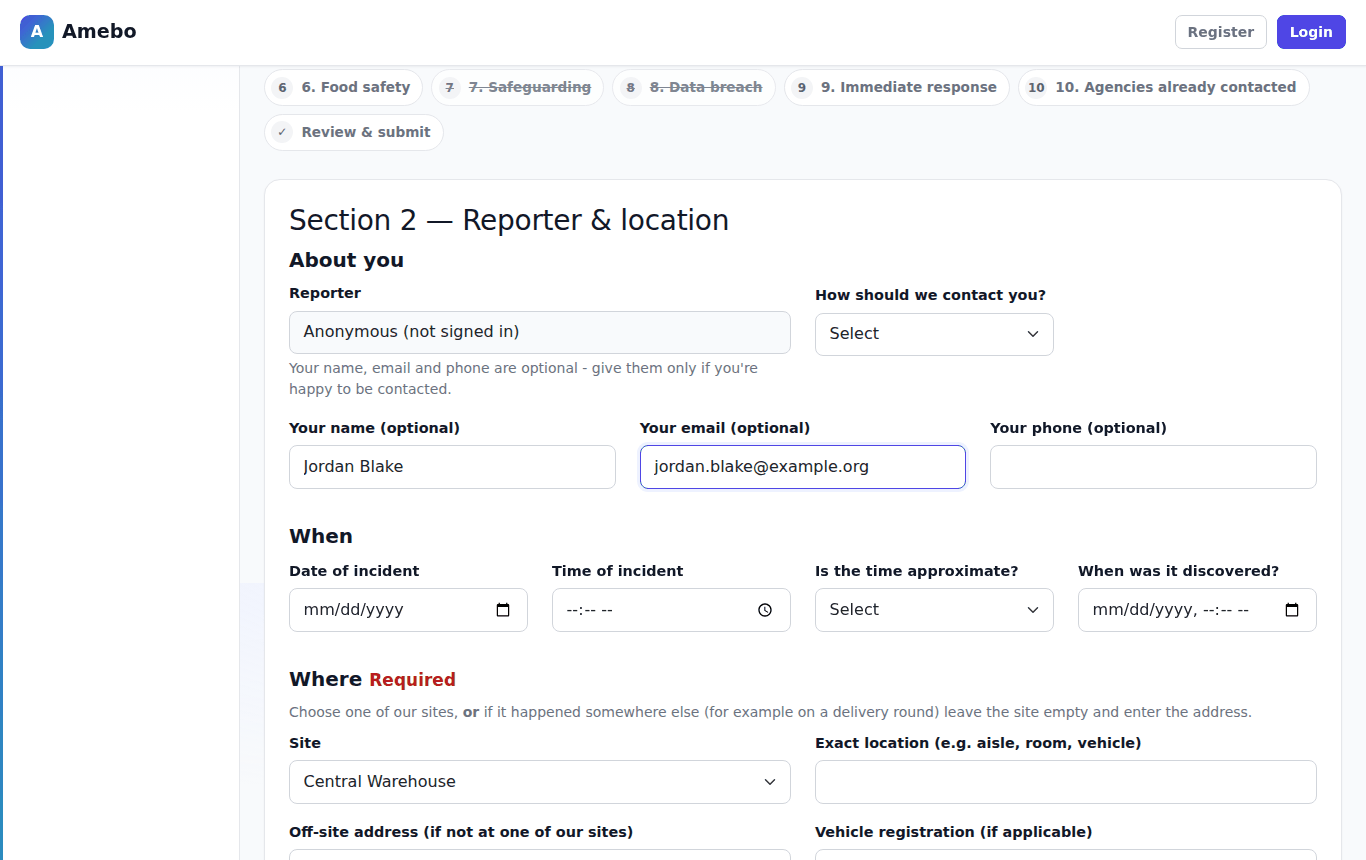
3. Section 2 — Reporter & location
- About you — optional name, email and phone if you are not signed in. Give an email address if you want a receipt and progress updates.
- When — the date and time of the incident (dates cannot be in the future).
- Where (required) — choose one of our sites, or, if it happened elsewhere (for example on a delivery round), leave the site empty and enter the off-site address.
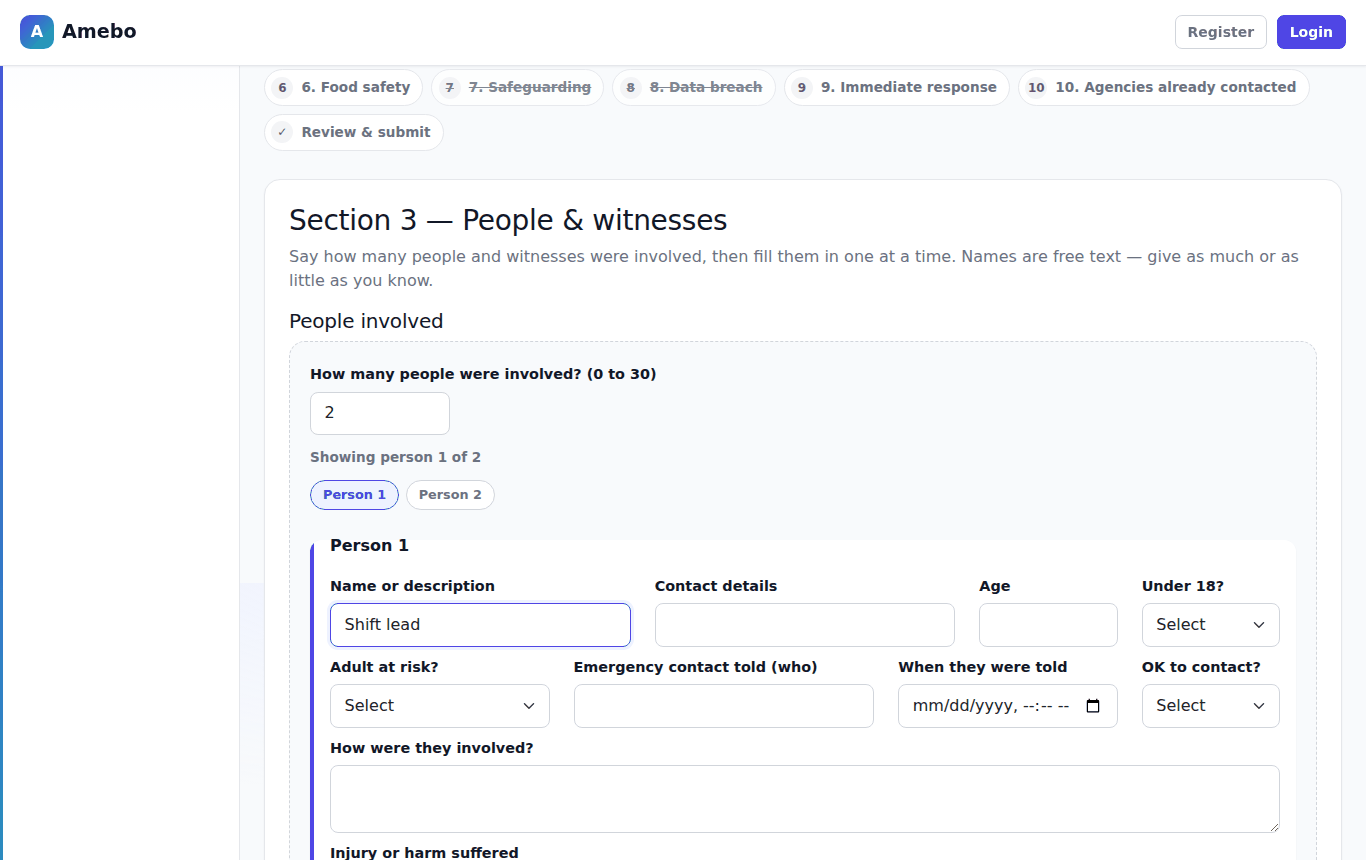
4. Section 3 — People & witnesses
Enter how many people were involved (and how many witnesses). A form appears for each person, one at a time — use the Person 1, Person 2 buttons to move between them. Names are free text; describe people if you do not know their names.
5. Section 4 — What happened
Describe what happened in your own words. You can attach files here: PDF, JPG, PNG, TXT or DOCX, up to 10 MB each.
6. Sections 5–8 (only if ticked in Section 1)
- 5 Injury & treatment — each injury and any first aid given.
- 6 Food safety — affected products, added one at a time with Add a product. Temperatures are in °C; quantities are a number with an optional unit, for example "12", "3 boxes" or "2.5 kg".
- 7 Safeguarding and 8 Data breach — what you know and what has already been done. These reports are only seen by staff authorised for sensitive cases.
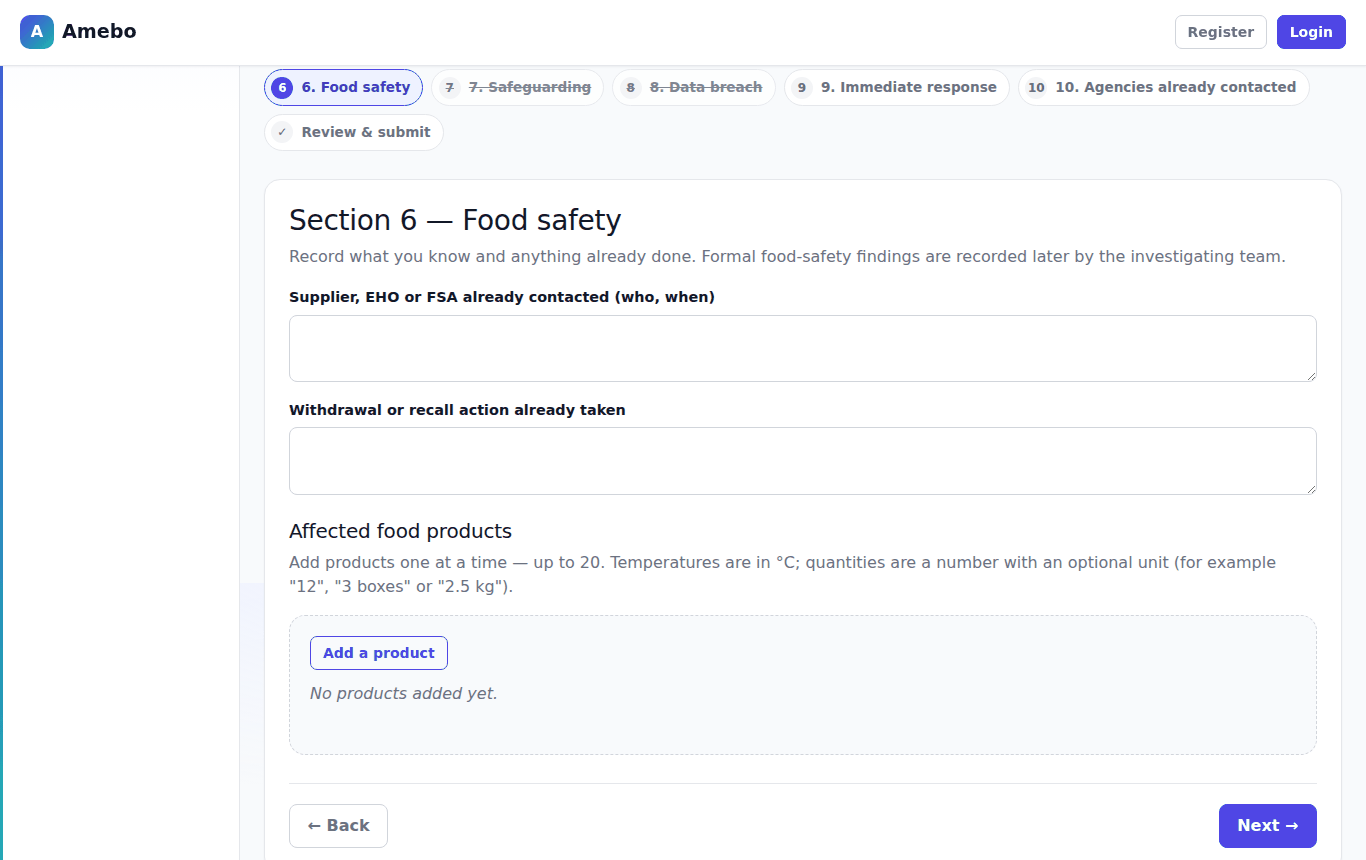
7. Sections 9–10 — Immediate response and agencies
Summarise what was done straight away (required), list any actions taken, and any organisations already contacted (for example the police or the environmental health officer).
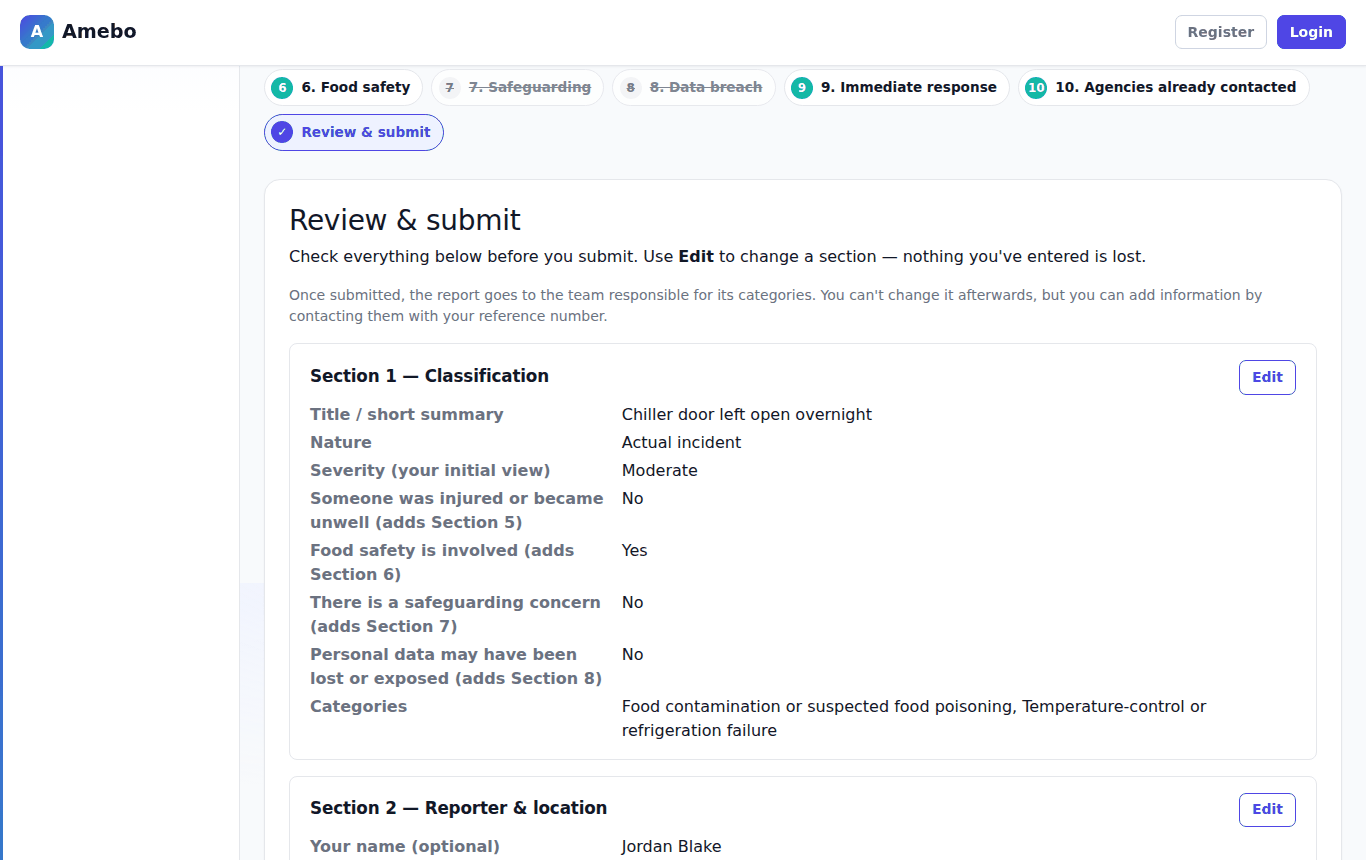
8. Review & submit
The last page shows everything you entered, section by section. Select Edit next to any section to change it — nothing you have entered is lost. When you are happy, tick the declaration that the information is accurate and select Submit report.
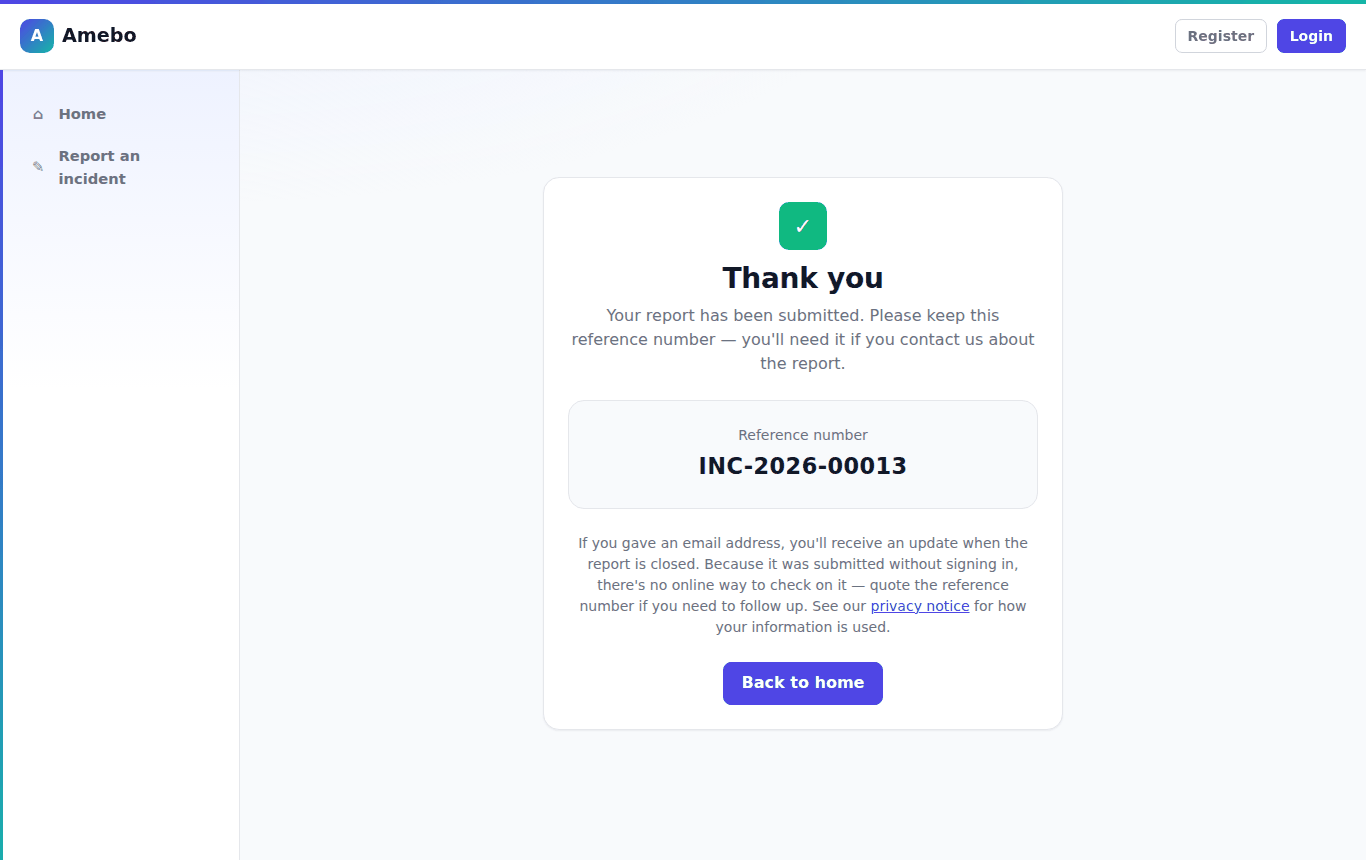
9. Confirmation
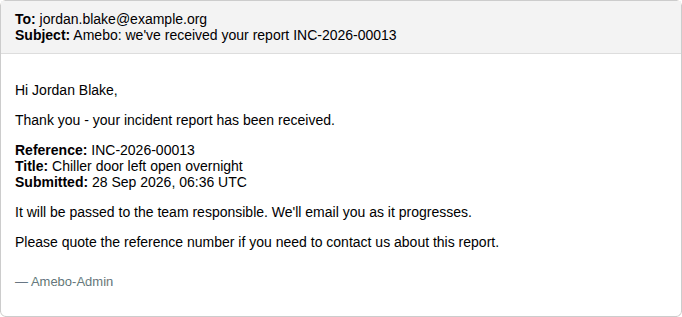
You will see your reference number (for example INC-2026-00013). Keep it — quote it if you contact us about the report. If you gave an email address you will also receive a receipt.